I am totally spoiled and have been lucky enough to belong to such a wonderful and amazing sewing and blogging community. This time, Ula from Lulu & Celeste has invited me along another blog tour that features something so very exciting for me. CANADIAN DESIGNERS! So without further ado, welcome to….
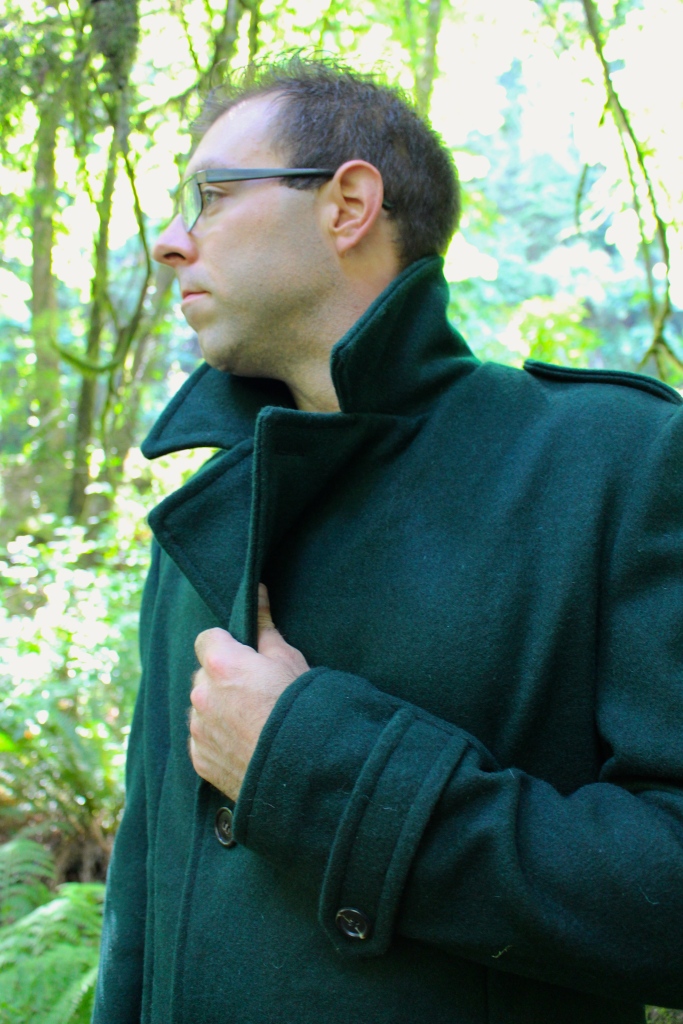
I’ve wrangled the hubby into modeling once again for me. One thing I find in the PDF community is that adult patterns are much more difficult to come by than childrens, and MEN’S patterns that much more elusive. So when I got the opportunity to test for Thread Theory Designs Inc I was all over it. Originally I was thinking I’d sew up a pair of their very handsome Jedediah Pants, as hubs is super tall and atheltic, so he has a heck of a time finding pants that fit well. But, as I was showing him the pattern online (for his final approval of course) he suddenly asks “Can I have the peacoat?”
Um, what? Seriously!? This from a man who is perfectly content to live in shorts and his dry fit t-shirts pretty much 10 out of 12 months of the year. And while I LOVE peacoats and their handsome elegance, ARE YOU FREAKING KIDDING ME??? DO YOU KNOW HOW MUCH WORK THOSE ARE???
But, well, he is being a good sport so I decide, how hard can it be? Right?
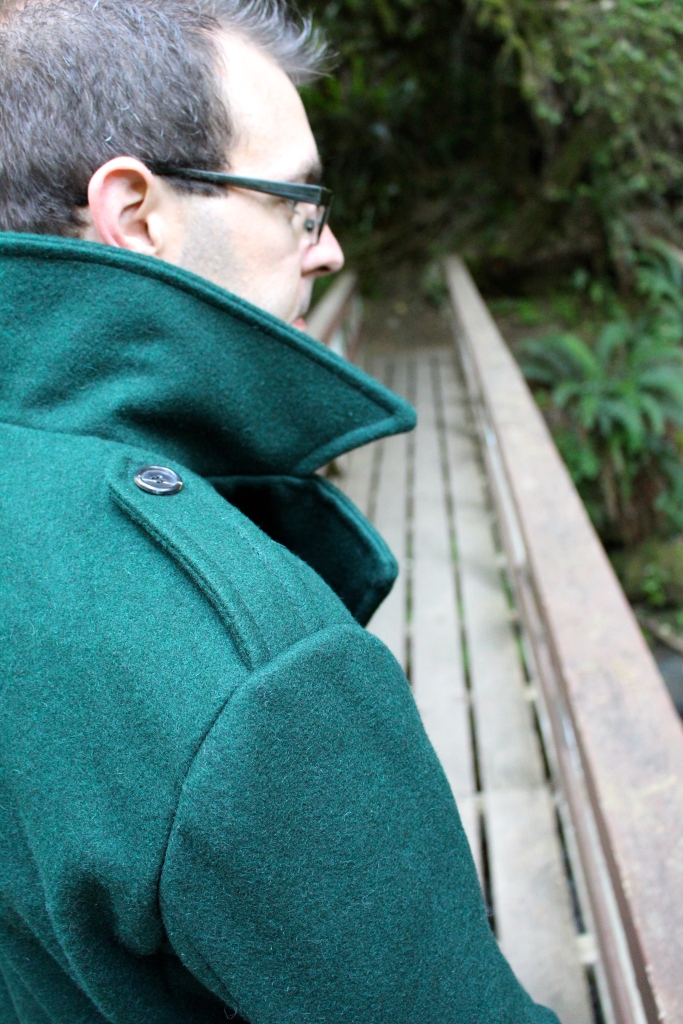
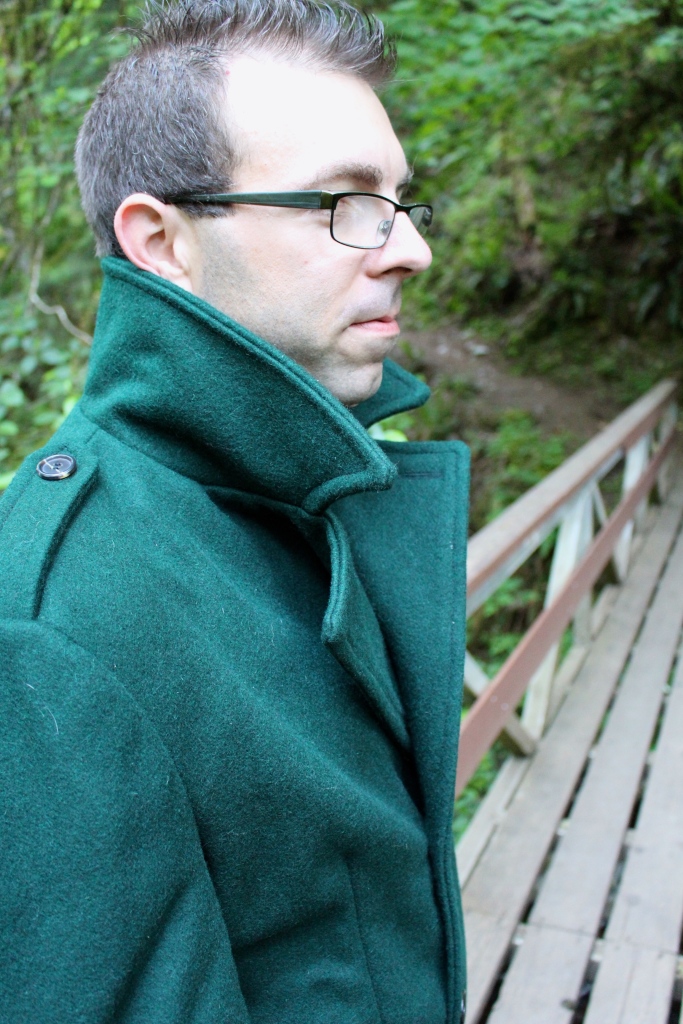
The Goldstream Peacoat is a very handsome pattern, with a more casual hooded option as well as the more traditional epaulet styled option. It ranges in size from XS to XXL, includes options for lengthening/shortening the pattern, as well as A4 and printshop printing options. While daunting, and for a more intermediate sewist, it’s definitely achievable with some patience, youtube, and maybe a few good friends thrown in for advice. Not to mention the fabulous tutorials Thread Theory includes on their page.
The pattern was very well drafted and easy to put together, which was key because it is HUGE. This is a men’s outwear pattern, and include pieces both for the main fabric as well as the lining, so get out the tape and scissors. There are scissor symbols that the designers have graciously included so you know where to trim as you are slogging through it while watching your favourite netflix shows. There are also tips littered through the directions to assist those who have possibly never worked with outwear materials before (like me) that will help wtih things like doing tailor’s tacks.
One modification I made to the pattern was to lengthen the body of the jacket 3 inches, and the sleeves another 2 inches. Hubby is 6’4″, and I was concerned that despite the fact I was making the large, it just wouldn’t hang low enough to really have the effect he wanted. So I had Stacey from Stacey in Stitches over, and she helped me lengthed the pattern to fit. The pattern includes lengthening/shortening lines, however you’re going to need a french curve and someone knowledgeable in grading curves to help with the arms especially if you are planning on lengthening the pattern.
For me, cutting this pattern was the most tedious and time consumer part. I chose a stunning hunter green wool that I got for a screaming deal as pre-cuts at a local shop. But I quickly discovered that when folded over, rotary cutting was going to be a nightmare. So I elected to cut all my mirror images separately, resulting is twice as much cutting but much more precise pieces. I guess I could have cut with shears, but seriously? I have girly hands. And wool is damn thick! I didn’t cut my lining right away, and instead opted to cut is as the construction required it to prevent pieces from fraying as I moved them around and worked on the pattern. I also chose only to interface the collar pieces and not the main front, as the wool I purchased had great body and would offer a lovely drape without appearing too stiff.
This pattern is definitely more reminiscience of paper patterns than some of the PDF patterns I’m used to. You aren’t going to find full colour photos and hand holding, however, the directions include helpful graphics as well as clear directions, so you shouldn’t run in to any issues if you take your time and read the steps thoroughly. As a matter of fact, I only had to use my seam ripper ONCE, and it was entirely my fault for putting wrong sides together on one of the sleeves. I figure that’s not too bad at all!
I did learn a LOT while sewing this pattern however. I’d never graded seam allowances, as I’ve never worked with such thick material. I also got creative when pressing my allowances open and utilized a thick cardboard tube from M’s craft stash to ensure that my seam allowances didn’t show on the outer jacket. I learned how to do a catch stitch (why can’t all hand sewing be that easy!?), and perfected my slip stitch. I’ve always attempted to avoid hand stitching, but with encouragement from my good friend Allison from E+M Patterns (lots of it I may add) I managed to pull off attaching the lining to the main coat with little heartache. While sitting in the sunshine on my back porch. As a matter of fact, the only hand stitching I botched royally was the buttons, when I attached the wrong ones to the wrong spots while watching Netflix. This is why I don’t watch TV and sew.
So, in time for hubby’s birthday, his peacoat was done. However, it’s nearing summer and HOT out. So, the poor guy had to put on some jeans and the jacket in order for me to take pics for you all. Lucky for him, the pattern shares a name with a local park, which just happened to be on our route that day and is a lovely cool, shady park. So, after many many MANY hours of assembling, taping, cutting, machine and hand sewing, his peacoat is complete. And it was totally worth it. The fit ended up a little big through the body, as hubby is lean, but overall I’m thrilled with it. If you want to end up with a more professional fitted look, Thread Theory has a phenomenal Tailor Peacoat Sew Along Series on their blog that will help you end up with a beautiful product for any guy.
Thank you so much to Morgan and Matthew for sending along the pattern to me to feature, as it was a great experience and a wonderful product. I’m thrilled with the quality of the pattern overall, and I think those Jedediah pants may just have to happen after all… Use the code CANADATOUR for 25% off all Thread Theory patterns from June 8th through July 8th to grab your copy. And definitely check out the rafflecopter draw for your own Comox Trunk Kit. So cool cause it’s not just the pattern but the fabric to make your creation as well! I wonder if Ula would notice if I entered it myself as well…
Now, if you want more Thread Theory go check out Handmade Boy and Rebel & Malice for their creations.
There are ton more prizes to be won, some sewing link-ups and a full roster over at Lulu & Celeste, so go check out Ula’s post here.
Thank you to all the wondeful sponsors and to all my fellow bloggers for another great tour featuring good ol’ Canucks!
Creative Bug * The Wholesome Mama * stitched by crystal * Shaffer Sisters * Call Ajaire * hibbadoray * Handmade Boy * Rebel & Malice * Sew Out of Control * All Things Katy! * Not Sew Fast * Conversas de Hermana * From-a-Box * Made by Sara * Climbing the Willow * Swoodson Says * Thread Riding Hood * Sprouting JubeJube * Create3.5 * Calm and Carrion * Stitches by Laura * Pattern Revolution * PhatQuarters * sewstarly * House of Estrela * gloria june * Sew Far North * AmandaRose * Mae & K


Pingback: Thread Theory Day 3: Goldstream Peacoat sewn by Sew Out of Control - Lulu & Celeste
It looks AMAZING! Great job 🙂 Thank you for taking part in the tour.
and you can so enter the giveaway too 😛
Thanks for having me Ula – I’m loving checking out all these new Canadian designers 🙂
AMAZING coat! That park is also one of my favourites 🙂
It’s quite the sew Jess – I feel like I learnt so much!
The coat turned out amazing! Great job!!!
Thank you so much for all your help Stacey – especially on lengthening those arms!
AMAZING sewing and coat! Your hubby looks so handsome and pleased with the coat. Gorgeous green wool too. 🙂
Thanks Allison 🙂 Such an awesome deal on the wool, and I even have some left. Thinking a matching skirt for the little for Daddy Daugther date this fall maybe!
Love this coat – would love to convince my hubby to let me make it for him.
Just do it Jamie – trust me, he’ll love it.
Wow, what an amazing job you did on this coat! Love all the details!
Thanks Dana. So many wonderful options that Thread Theory has included. I really loved how much more professional those little details made the jacket. I now wish I would have gotten a pic of it open so you could see the inside pocket, and had him flip up the pockets. He was so impressed that they were lined 🙂
So gorgeous! I am torn between the pants, the cardigan and this coat! They are all so perfect for my husband!
I’m diving into the pants next Heather – I’m addicted to Thread Theory now I think!
That looks so amazing! It must be so nice for your husband to have something made to fit his frame so well. Go you for putting in the hard work!
Thanks so much Elena. I’m looking forward to braving some more stuff for him – since he is so tall it would be awesome to be able to make his wardrobe to fit him 🙂
Pingback: Canadian Pattern Designer Blog Tour Schedule and GIVEAWAY details - Lulu & Celeste
Pingback: Canadian Pattern Designer tour: Interview with Thread Theory - Lulu & Celeste
Pingback: Canadian Pattern Designer blog tour: Week 2 in review - Lulu & Celeste
Pingback: Lola by Victory Patterns - Canadian Pattern Designer Tour - Swoodson Says
Pingback: Canadian Pattern Designer Blog Tour - Filles a Maman Mimis and Giveaway! -
Pingback: Canadian Pattern Designer tour: Thread Theory Day 1 - Lulu & Celeste
Pingback: Thread Theory Day 2: Strathcona Henley from Rebel & Malice - Lulu & Celeste
Pingback: A Year in Review 2015: Top 5 posts and referrers- Lulu & Celeste